You can go here for a ton of Alex's rack building stuff, you can go here for the same from Alistair.
So with that, let me just warn you that this is gonna be long and boring. I've locked the door to the shop and headed inside for the night and I'd advise you to do what I should be doing, which is to go to bed. But if you wanna stay up and keep me company, that's cool too.
Coupla weeks ago, John facilitated a meeting with Alex, who was super generous with his Saturday afternoon and helped me fast-track my education. I lead-footed it back to Spo and spent the following Monday online. All kinds of crazy shit started showing up on my doorstep later in the week. Here it is, all scraped together on my workbench:

That's about $600 worth of stuff. Insane, I know. But if you're thinking about giving this a try and you're on a budget, don't let this discourage you. The thing about rack building is that you can do it super-cheap if you want to. I just happened to go a little nuts.

I was already convinced and then Alex double-convinced me about dropping some serious coin on some didymium glasses. They filter out the orange flare when you're brazing and totally let you see what you're doing. Money well spent for old diminishing eyes like mine. Plus they make me look like a million bucks. It's also true that chicks dig didymium, so I am told. The cheesy backup pair on the right is for when I drop and shatter the expensive ones and have to kiss the chicks goodbye and get back to work.

This is about $60 worth of braze-ons. Enough for quite a few bikes and then some. Thing is, if your bike doesn't have eyelets, you need something to tie your rack to and these will do the trick. They came from an e-tailer called Nova Cylces and they have an awesome website and even better service.

This is the actual tubing you build the racks from. Got it from a company called Aircraft Spruce (recommended by Alex, like most of the other tooling and material suppliers, thereby saving me gobs of time). You're looking at (8) each 4' lengths. The bill was $108, so something like $3.40/ft by the time it hits your door. Tubing is definitely the pricey part of building racks.

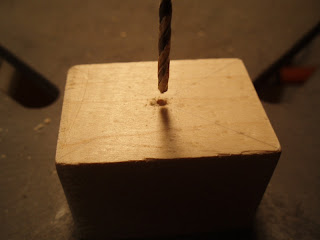
Here are some maple and elm blocks I picked up at Woodcraft for making tube clamps out of. More on this later.

Flux and a coupla pounds of brazing rod from Henry James. A lifetime supply of flux brushes from Harbor Freight that set me back $1.99.

Two Ridgid workhorse tubing benders from Toolup.com - I'm geared up for 5/16" and 3/8" tubing. These two sizes cover a boat-load of what you need to get started and then you can go from there, if you need to.
So I had ambitious plans for tonight - this and that and then I was gonna do my first brazing. But as usual, my optimism had run away with myself. But I did get some maple tube clamps together.


I'm saving the scrap halves for when I bust the good ones or catch them on fire. The scraps will work in a pinch.
Sorry about the weird formatting of this post. I just switched over to the new blogger post editor and I'm a long way from getting it figured out.

1 comment:
Custom Rack Request #2:
There is a bike game that we play during big downtown events such as HoopFest, First Night, and "Pig Out". It consists of riding the homeless bikes around with full-size inflatable dolls strapped onto the back of the bikes. I’ll try to find pictures later today. Anyway, I always come up short when searching for suitable carrying system. It’s embarrassing to have your doll list to the left or right all the time. One time, “Birtha” fell off the rack and into a barricade and popped. It’s the dolls that looses here, as you can see.
I am interested in seeing a rack design intended for carrying blow up dolls.
Thanks.
Post a Comment